Are you thinking about going solar and are curious about how solar panel roof installation works? As the solar industry continues to evolve and become more mainstream, so does the efficiency of solar roof mounts. Read on to learn how to mount solar panels on the roof to ensure maximum energy efficiency and the safety of your roof. Just remember – this is a job for the pros (no DIYing here), so be sure to contact a reputable solar panel installer!
How Are Solar Panels Mounted To The Roof?
Installing solar panels on the roof is an excellent way to tap into renewable energy, lower your electric bills, and increase the value of your home. But how are solar panels mounted to the roof?
The solar industry has developed a variety of solar mounting solutions for securely installing solar panels on different roofing materials while ensuring durability and preventing damage to the roof. Before installing solar panels, make sure your roof is in good condition and is compatible with a solar energy system.
You can read more about the best roofing materials for solar panels here.
How Are Solar Panels Attached to a Shingle Roof?
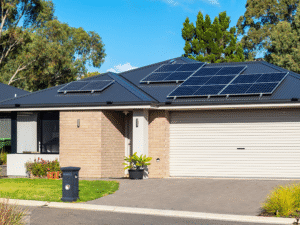
For homes with asphalt shingle roofs (which are very common here in the U.S.), solar panels are typically installed using a lag bolt and flashing system. The mounting hardware is secured to the roof’s rafters using lag bolts, which creates a strong and stable foundation for the solar panels. Then, a piece of flashing is placed underneath the shingles to prevent water from seeping in and causing leaks. The racking system is attached to these mounts, providing a base for the solar panels to be secured to.
Solar Panel Mounting on Metal Roofs
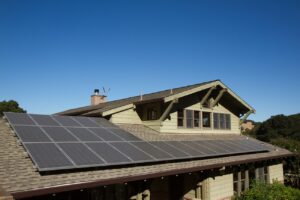
Metal roofs, particularly those with standing seams, are one of the most convenient for solar panel installation. Special U-clamps allow the panels to be attached directly to the seams without the need for drilling. This minimizes the risk of leaks and makes installation easier.
Choosing the Right Type of Solar Roof Mount
There are different types of solar roof mounting systems available, and selecting the right one depends on your roof type and energy goals.
Here are a few of the different types of solar roof mounting systems:
- Railed Systems: These are the most common and involve mounting fixed, stationary rails securely to the roof that hold the solar panels in place. This is the simplest and most cost-effective way to mount solar panels.
- Rail-less Systems: This is a newer alternative that attaches the solar panels directly to roof mounts, reducing the materials needed and lowering the installation time.
- Ballasted Systems: These are typically used on flat roofs and do not require penetration. Instead, they use weight to hold the panels in place.
- Sun-Tracking Systems: These customized systems adjust the angle of the panels to follow the sun for maximum efficiency. These mounting structures can be expensive, but if you’re dealing with a unique scenario, they may be your best option.
Steps For How To Mount Solar Panels On The Roof
The solar panel installation process varies depending on your roof type and the solar mounting system used, but it typically involves the following steps.
Step 1: Choose the Solar Mounting System
Select the best solar mounting system based on your roof type. For sloped roofs, railed or rail-less systems are the most common and effective, while flat roofs often use ballasted systems or sun-tracking systems for optimal sunlight exposure.
Step 2: Install Roof Attachments
Follow the proper steps to install the roof attachments for your solar mounting system. For railed systems, drill into the roof to attach the mounting brackets or anchors to the rafters or decking with stanchions and use flashing to prevent roof leaks. Make sure there are at least 4 feet between stanchions. Non-penetrating systems, like Solar Stack, use adhesive foam to bond mounts directly to the roof surface without drilling.
Step 3: Attach Mounting Rails
Secure mounting rails to the roof attachments using clamps or screws. Ensure the rails are aligned properly to the attachments, as they are the foundation for the solar panels and must be aligned properly to maximize structural integrity, sunlight capture, and energy efficiency.
Step 4: Secure Solar Panels
Position the solar panels onto the rails and fasten them securely with clamps. Solar panels can be oriented in portrait or landscape configurations, depending on the roof space and the home’s energy needs.
Step 5: Check for Stability
Ensure all components are properly secured and can withstand environmental factors like wind and snow loads. Use thicker rails or additional support in areas that take the brunt of wind force or that see heavy snow accumulation.
Step 6: Connect Electrical Components
Once mounted, wire the panels to your inverter and connect them to your electrical system to begin generating power to your home.
Can Solar Roof Mounts Damage Your Roof?
A common concern with solar roof mounts is whether they’ll cause structural damage to your roof or leaks. Solar panels do add some weight to your roof – typically around 2.5-2.7 pounds per square foot. Most roofs can handle this extra load without any issues.
Before you commit to solar panel installation, have a structural engineer assess your roof to ensure it can support the solar panel system. If you find that your roof will not support solar panels, you may need to have it replaced first.
Properly installed solar panels should not cause leaks, even if the solar mount was installed with penetrations to your roof. The solar industry has worked hard to develop techniques to help prevent leaks and water intrusion, such as flashing and sealants.
Solar panels can actually help protect your roof from wear and tear by acting as a shield for your roof, guarding it against the elements. (Talk about a win-win!).
Work With a Reputable Company For Your Solar Panel Roof Installation
While there are tons of different solar mounting systems and techniques, the quality of your solar panel roof installation weighs heavily on choosing a reputable company to install your system. Go with a company that is backed by warranties and has a proven track record for installing solar systems on homes.
Blu Solar is a trusted solar company in Denver, CO dedicated to giving you the best (and easiest!) experience possible. We’re all about transparency and giving you the best possible solar system for your budget.
Visit our contact page to request your complimentary custom solar estimate today!